Java Getting Started
Java Install
Some PCs might have Java already installed.
To check if you have Java installed on a Windows PC, search in the start bar for Java or type the following in Command Prompt (cmd.exe):
C:\Users\Your Name>java -version
If Java is installed, you will see something like this (depending on version):
java version "11.0.1" 2018-10-16 LTS

Java(TM) SE Runtime Environment 18.9 (build 11.0.1+13-LTS)

Java HotSpot(TM) 64-Bit Server VM 18.9 (build 11.0.1+13-LTS, mixed mode)
If you do not have Java installed on your computer, you can download it for free at oracle.com.
Note: In this tutorial, we will write Java code in a text editor. However, it is possible to write Java in an Integrated Development Environment, such as IntelliJ IDEA, Netbeans or Eclipse, which are particularly useful when managing larger collections of Java files.
Setup for Windows
To install Java on Windows:
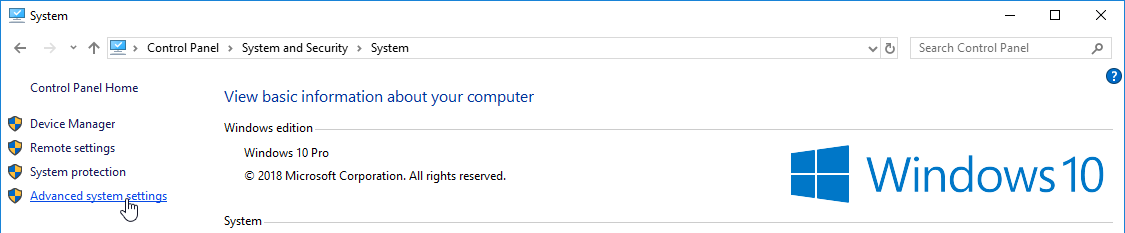
- Go to "System Properties" (Can be found on Control Panel > System and Security > System > Advanced System Settings)
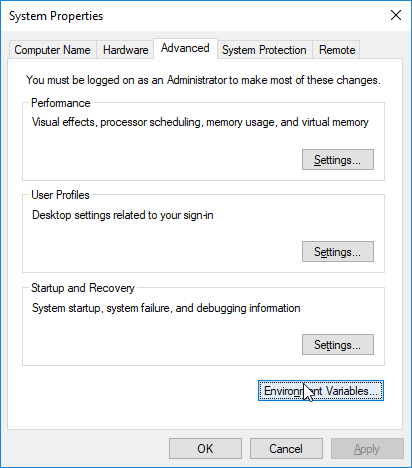
- Click on the "Environment variables" button under the "Advanced" tab
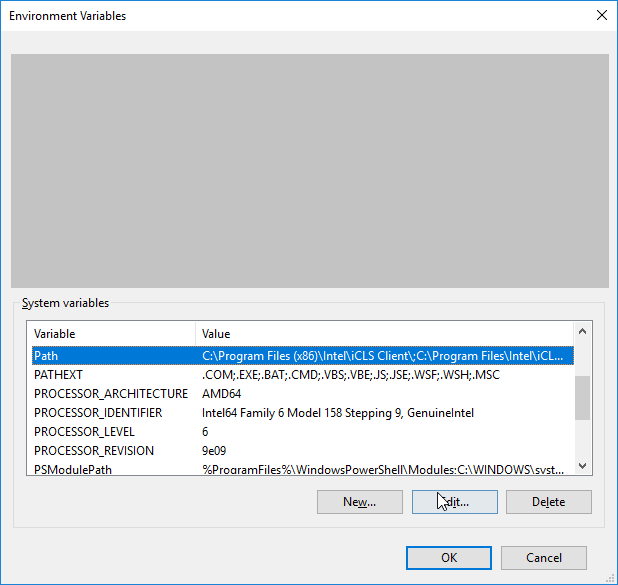
- Then, select the "Path" variable in System variables and click on the "Edit" button
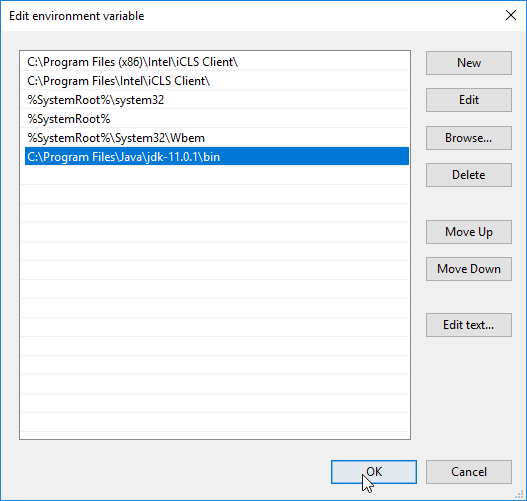
- Click on the "New" button and add the path where Java is installed,
followed by \bin. By default, Java is installed in C:\Program
Files\Java\jdk-11.0.1 (If nothing else was specified when you installed it).
In that case, You will have to add a new path with: C:\Program
Files\Java\jdk-11.0.1\bin
Then, click "OK", and save the settings - At last, open Command Prompt (cmd.exe) and type java -version to see if Java is running on your machine
Step 1
Step 2
Step 3
Step 4
Step 5
Write the following in the command line (cmd.exe):
C:\Users\Your Name>java -version
If Java was successfully installed, you will see something like this (depending on version):
java version "11.0.1" 2018-10-16 LTS
Java(TM) SE Runtime Environment 18.9 (build 11.0.1+13-LTS)
Java HotSpot(TM) 64-Bit Server VM 18.9 (build 11.0.1+13-LTS, mixed mode)
Java Quickstart
In Java, every application begins with a class name, and that class must match the filename.
Let's create our first Java file, called Main.java, which can be done in any text editor (like Notepad).
The file should contain a "Hello World" message, which is written with the following code:
Main.java
public class Main {
  public static void main(String[] args) {
    System.out.println("Hello World");
  }
}
Don't worry if you don't understand the code above - we will discuss it in detail in later chapters. For now, focus on how to run the code above.
Save the code in Notepad as "Main.java". Open Command Prompt (cmd.exe), navigate to the directory where you saved your file, and type "javac Main.java":
C:\Users\Your Name>javac Main.java
This will compile your code. If there are no errors in the code, the command prompt will take you to the next line. Now, type "java Main" to run the file:
C:\Users\Your Name>java Main
The output should read:
Hello World
Congratulations! You have written and executed your first Java program.
